Garrattfan's Modelrailroading Pages
NS 6200 class
Numbering NS6228
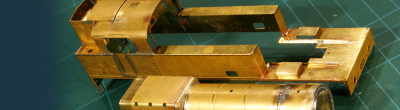
After painting and lining there are but a few jobs to do before the superstructure is ready. One of them is numbering the locomotive. I have experience with water slide transfers (decals) and once you get the hang of it, it is relatively simple to do. During the build of the MDC Roundhouse Shay I have already described lining and lettering with decals, so please refer to these pages for details.
The transfers I bought for lettering the NS6200 however were pressfix transfers: you position them and then rub them. Done. Easy! Easy? No sir, I find it infinitely more difficult.
and most important of all:
With that in mind I set off
|
|
The set I received from Godfather Models & Supplies in Haarlem
I chose 6228 for the simple reason that the stencil was made for the 8826 and would result in the least loss of numbers
|
|
 |
The short instruction that was included in the package advised to use high quality 3M tape to stick the non-transfer side of the carrier. This makes it easier to handle and position.
So on the photo it is under the tape.
|
 |
And it did help but I must admit I destroyed two decals before I was able to get a third on the right spot on the buffer beam of the 6200. By then I had learned that using the tape in a horizontal fashion made things a lot easier. Well, rubbing is easy, just make sure you apply pressure evenly, sufficiently and everywhere. Carefully peel the tape and the carrier away |
 |
Tada! |
 |
Now I had to assemble a locomotive number from four individual digits. Here comes another vice of pressfix transfers. With waterslide transfers getting the spacing, the perpendicular orientation and the vertical position right is maybe not very easy but most certainly, given some patience, not overly difficult. But how on earth do you do that with pressfix transfers? I came up with this method.
I stuck a piece of tape to my cutting mat and put another one on top of it. |
 |
I drew a black line to make the edge more visible. |
 |
Then I peeled it away and turned it over with the sticky side up and secured it on the outer ends with some tape. I carefully cut out the individual digits and patiently positioned them (over and over again) until they were correctly spaced and aligned. Do not forget to work mirrored! |
 |
I cut a small piece of tape with the black line on the edge and positioned it horizontally on the buffer beam, carefully measuring its perfect alignment relative to the top of the buffer beam.
Then I placed the stuck-together-tape-and-numbers-assembly over the line making sure both black lines covered each other. Then followed a good rub |
 |
This is the result. Spacing is good, perpendicular position is good. I was not entirely happy with the 6 being a tad too low, but I was ready to accept it.
After my elegy on the pressfix transfers I found two big advantages of them:
|
 |
Having looked at the loco several times over a few days I found the 6 too much out of place. I removed it and retried. This time the horizontal alignment is good. Maybe the spacing is a bit too much but being in line with the 228 makes things a lot better. |
 |
The rear number in the making |
 |
Done. Not perfect but good enough. |
 |
An detail photo reveal traces in the from of the carrier film. I am not sure if that is deposit from the decal carrier or the result of the rubbing action. But again I have found a disadvantge of pressfix transfers. If possible I will avoid them in the future. A valuable lesson |


Sign my
GuestBook